On-premises Data Gateway Setup
To use the OctoMesh Connector in Power BI Service with scheduled data refresh, you need to set up an On-premises Data Gateway.
Prerequisites
- On-premises Data Gateway installed on a Windows server
- Administrator access to the Gateway server
- Power BI Service account with Gateway admin permissions
Step 1: Install the Connector on the Gateway
-
Download the
OctoMeshConnector-*.pqxfile to the Gateway server from the Download Center. -
Copy the file to the Gateway's Custom Connectors folder:
C:\Windows\ServiceProfiles\PBIEgwService\Documents\Power BI Desktop\Custom ConnectorsImportantThis path is different from the user's Custom Connectors folder. The Gateway service runs under a separate account (
PBIEgwService). -
Restart the Gateway service:
- Open Services (services.msc)
- Find On-premises data gateway service
- Click Restart
Step 2: Verify Connector Installation
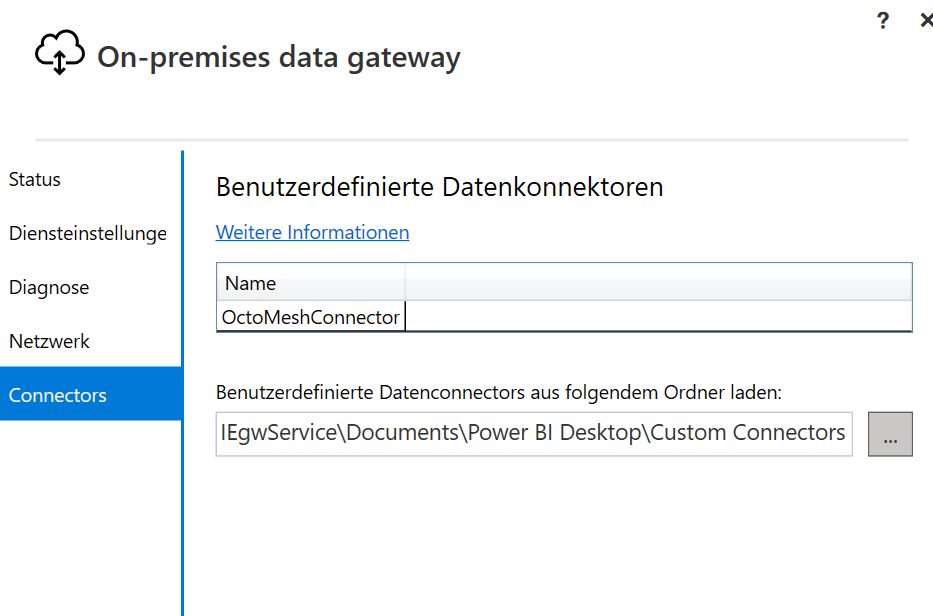
- Open the On-premises data gateway application.
- Navigate to the Connectors tab.
- Verify that OctoMeshConnector appears in the list.
Step 3: Enable Custom Connectors in Power BI Service
- Open Power BI Service.
- Navigate to Settings (gear icon) > Manage connections and gateways.
- Select your Gateway cluster.
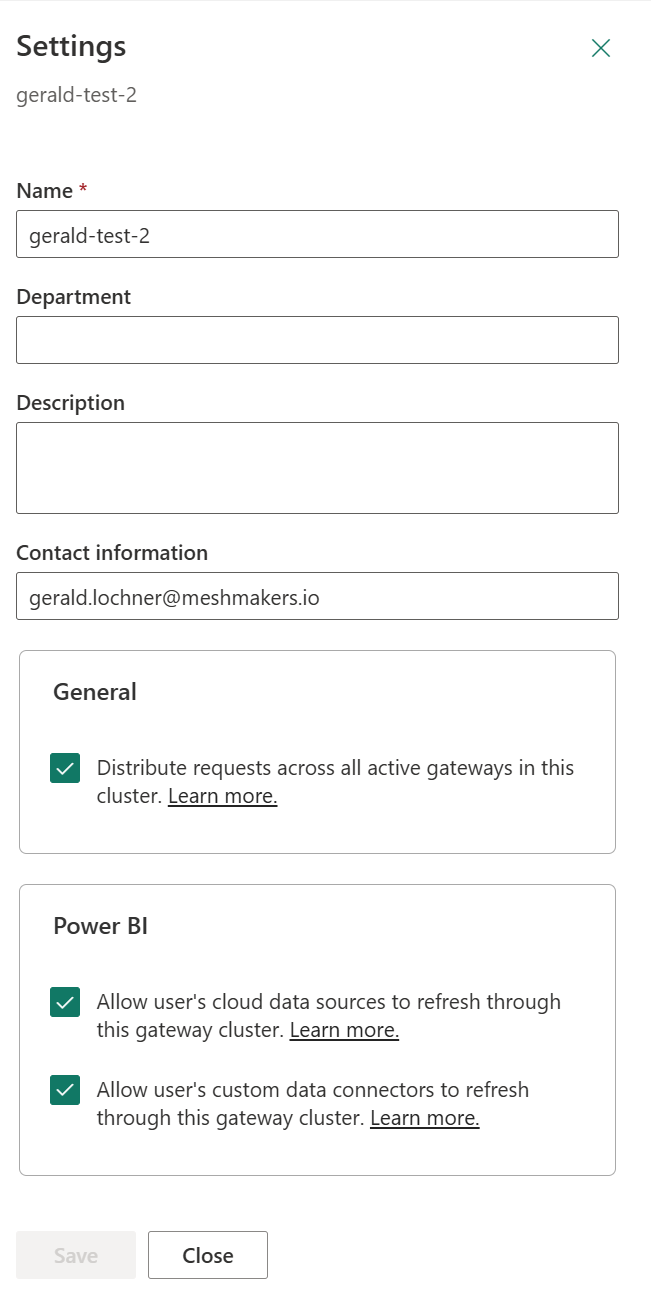
- Click on Settings (three dots menu > Settings).
- Enable the following options under Power BI:
- Allow user's cloud data sources to refresh through this gateway cluster
- Allow user's custom data connectors to refresh through this gateway cluster
- Click Save.
Step 4: Create a Connection
Create a Runtime Query in OctoMesh
- Log in to your OctoMesh account.
- Navigate to the Runtime Queries section, see Runtime Query Builder Documentation.
- Create a new Runtime Query or select an existing one.
- Note the
rtIdof the Runtime Query you wish to use.
Create the Connection in Power BI Service
- In Power BI Service, go to Settings > Manage connections and gateways.
- Click + New to create a new connection.
- Select your Gateway cluster.
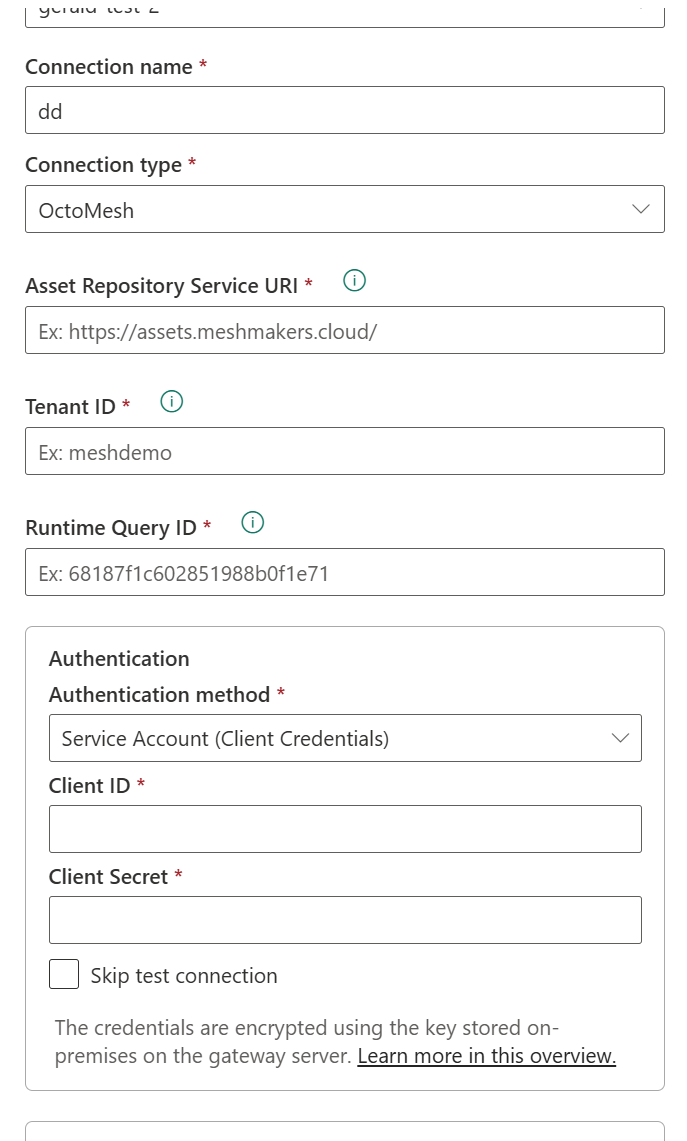
- Configure the connection:
- Connection name: A descriptive name (e.g.,
OctoMesh-Production) - Connection type: Select OctoMesh from the dropdown
- Asset Repository Service URI: Your OctoMesh Asset Repository URL (e.g.,
https://assets.<cluster>.octo-mesh.com/— replace<cluster>with the cluster your tenant runs on, such asprod-1orprod-2) - Tenant ID: Your OctoMesh tenant identifier (e.g.,
meshdemo) - Runtime Query ID: The
rtIdof the Runtime Query
- Connection name: A descriptive name (e.g.,
Configure Authentication
Select Service Account (Client Credentials) as the authentication method:
- Client ID: The OAuth client ID configured in OctoMesh Identity Service
- Client Secret: The client secret for the service account
Client Credentials Setup
Contact your OctoMesh administrator to create a service account with:
- Grant Type:
client_credentials - Scopes:
assetTenantAPI.full_access
The service account must have access permissions for the tenant and Runtime Query you want to use.
- Click Create to save the connection.
Next Steps
- Power BI Service - Publish reports and configure scheduled refresh
- Troubleshooting - Gateway problems and solutions