Write your first Mesh Adapter
This tutorial will help you to write your first Mesh Adapter for OctoMesh.
For brevity, we will assume that you have already set up your development environment and have a basic understanding of C# and .NET Core.
We will also assume that you have set up a C# project as documented in the Creating Adapter Project section.
For a reference implementation you can check the following repository
Overview
We will execute the following steps:
Mesh Adapters are designed to run in the cloud only. They directly can connect ot the OctoMesh repositories (MongoDB + CRATE.IO). They may receive data from an Edge Adapter or other sources.
1. Add configuration to run the adapter
Navigate to the AdminUI and create a new adapter:
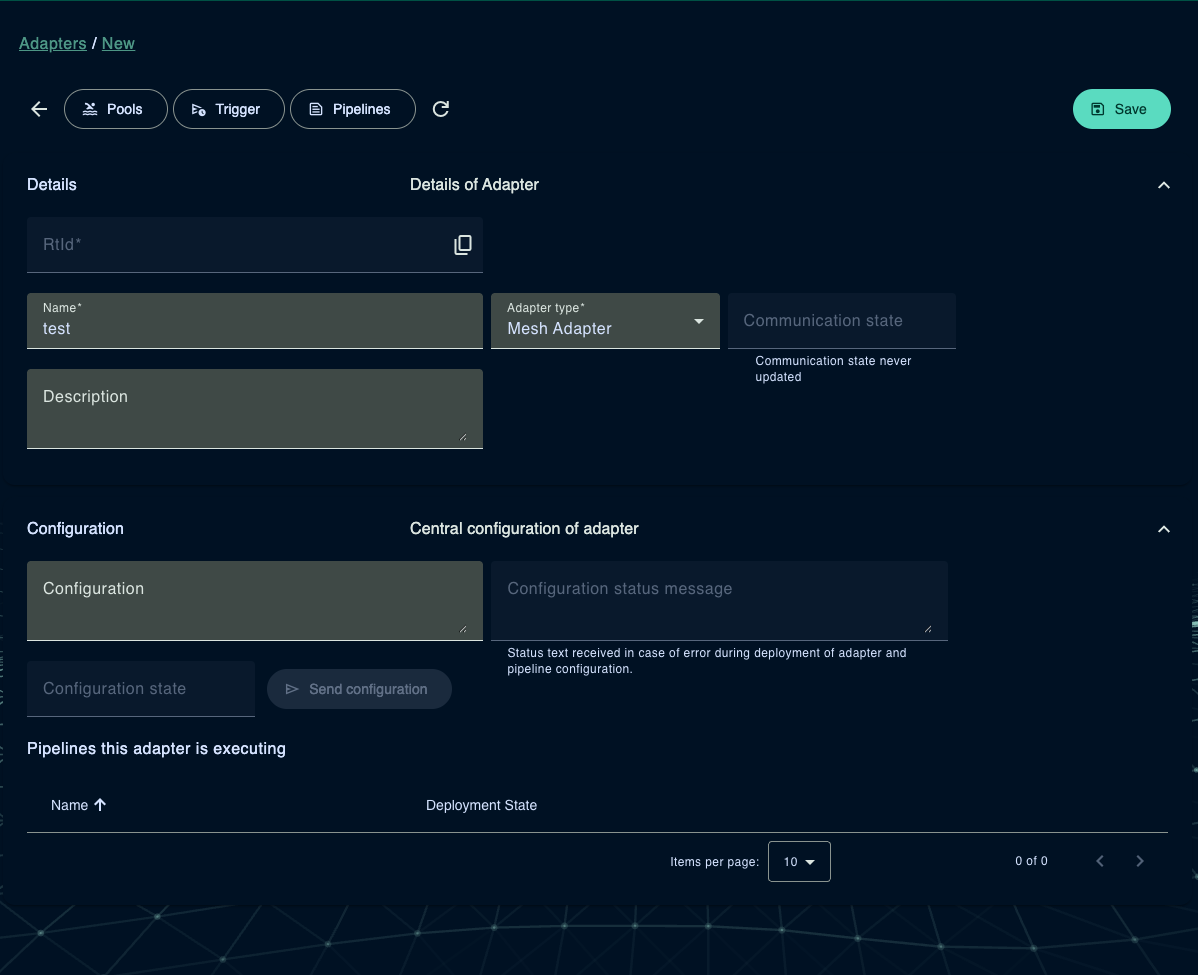
After creating the adapter, we need the runtime identifier (rtId) to configure the adapter in the code.
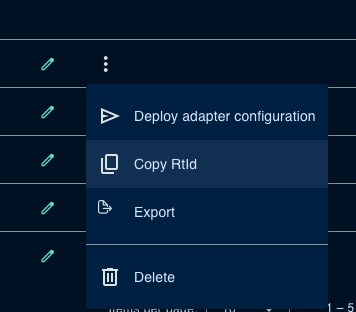
With that information in the clipboard, we can move to the next part.
2. Implement adapter logic
Update the launch profile to include the adapter configuration.
{
  "$schema": "http://json.schemastore.org/launchsettings.json",
  "profiles": {
    "AdapterEdgeDemo": {
      "commandName": "Project",
      "environmentVariables": {
        "ASPNETCORE_ENVIRONMENT": "Development",
        "OCTO_ADAPTER__TENANTID": meshtest,
        "OCTO_ADAPTER__ADAPTERRTID": 6760711ec4ff02221e0b532e,
        "OCTO_ADAPTER__ADAPTERCKTYPEID": "System.Communication/MeshAdapter",
        "OCTO_SYSTEM__AdminUserPassword": "OctoAdmin1",
        "OCTO_SYSTEM__DatabaseUserPassword": "OctoUser1",
        "OCTO_SYSTEM__UseDirectConnection": true
      }
    }
  }
}
The OCTO_ADAPTER__TENANTID is the tenant id of the adapter.
The OCTO_ADAPTER__ADAPTERRTID is the runtime identifier of the adapter,
which is used to identify the adapter in the system.
Replace the values with the ones you copied from the AdminUI.
The OCTO_ADAPTER__ADAPTERCKTYPEID is the type of the adapter, which is System.Communication/MeshAdapter.
The SYSTEM__AdminUserPassword and SYSTEM__DatabaseUserPassword are the passwords for the admin and database user.
Because we are running the adapter in development mode, we can use the default passwords.
Mesh Adapters directly connect to the OctoMesh repositories for performance reasons.
In Program.cs start with configuring the adapter.
// WebAdapterBuilder is a builder for creating Adapters acting as a Socket (Listener) or a Web API (Host)
var adapterBuilder = new WebAdapterBuilder();

await adapterBuilder.RunAsync(args, builder =>
{
    // Define the configuration for the adapter
    builder.Services.Configure<OctoSystemConfiguration>(options =>
        builder.Configuration.GetSection("System").Bind(options));

    // Add services to the container.

    // Add the adapter service to startup and shutdown the adapter
    builder.Services.AddSingleton<IAdapterService, AdapterMeshDemoService>();

    // Add mesh adapter nodes and services to the container
    builder.Services.AddOctoMeshAdapter();

}, app =>
{
    app.UseOctoMeshAdapter();
});
Next we have to implement the IAdapterService interface,
create a new class AdapterMeshDemoService and implement the interface IAdapterServiceas shown below.
using Meshmakers.Octo.Common.DistributionEventHub.Services;
using Meshmakers.Octo.Communication.Contracts.DataTransferObjects;
using Meshmakers.Octo.Sdk.Common.Adapters;
using Meshmakers.Octo.Sdk.Common.Services;
using Microsoft.Extensions.Logging;

namespace Meshmakers.Octo.Communication.MeshAdapter.Demo.Services;

internal class AdapterMeshDemoService(
    ILogger<AdapterMeshDemoService> logger,
    IPipelineRegistryService pipelineRegistryService,
    IEventHubControl eventHubControl) : IAdapterService
{
    public Task<bool> StartupAsync(AdapterStartup adapterStartup, List<DeploymentUpdateErrorMessageDto> errorMessages,
        CancellationToken stoppingToken)
    {
        logger.LogInformation("Startup of mesh adapter");
        try
        {
            return Task.FromResult(true);
        }
        catch (Exception e)
        {
            logger.LogError(e, "Error while startup");
            throw;
        }
    }

    public async Task ShutdownAsync(AdapterShutdown adapterShutdown, CancellationToken stoppingToken)
    {
        try
        {
            logger.LogInformation("Shutdown of mesh adapter");


            logger.LogInformation("Mesh Adapter service stopped");
        }
        catch (Exception e)
        {
            logger.LogError(e, "Error while shutdown");
            throw;
        }
    }
}
After these steps, you can run the adapter and see the log output.
In the Admin UI, you should see the adapter to be online!

Now we proceed to the next step.
3. Implement node logic
First, we have to create a node configuration record. This record is used to serialize and deserialize configuration data for the node.
[NodeName("Demo", 1)]
public record DemoNodeConfiguration : SourceTargetPathNodeConfiguration
{
}
NodeName defines the name and the version of the node.
An adapter may have multiple nodes with the same name but different versions.
Typically, a node has input and output data.
The SourceTargetPathNodeConfiguration is used to define the input and output data path
(Path, TargetPath) for the node.
Extract and load nodes may have only input data or only output data.
In this case, the PathNodeConfiguration or TargetPathNodeConfiguration is used.
Second, we need to create the node itself.
[NodeConfiguration(typeof(DemoNodeConfiguration))]
public class DemoNode(NodeDelegate next) : IPipelineNode
{
    public async Task ProcessObjectAsync(IDataContext dataContext, INodeContext nodeContext)
    {
        // Continue with next node in pipeline
        await next(dataContext, nodeContext);
    }
}
The NodeConfiguration attribute is used to define the configuration record for the node.
Third, we have to modify the startup configuration to include the node.
// WebAdapterBuilder is a builder for creating Adapters acting as a Socket (Listener) or a Web API (Host)
var adapterBuilder = new WebAdapterBuilder();

await adapterBuilder.RunAsync(args, builder =>
{
    // Define the configuration for the adapter
    builder.Services.Configure<OctoSystemConfiguration>(options =>
        builder.Configuration.GetSection("System").Bind(options));

    builder.Services.Configure<MeshAdapterConfiguration>(options =>
        builder.Configuration.GetSection("Adapter").Bind(options));

    // Add services to the container.

    // Add the adapter service to startup and shutdown the adapter
    builder.Services.AddSingleton<IAdapterService, AdapterMeshDemoService>();

    // Add mesh adapter nodes and services to the container
    builder.Services.AddOctoMeshAdapter()
        .RegisterNode<DemoNode>(); // Sample to register a node

}, app =>
{
    app.UseOctoMeshAdapter();
});
Next, we have to implement the node logic. We extend the node configuration with a new property MyMessage.
[NodeName("Demo", 1)]
public record DemoNodeConfiguration : TargetPathNodeConfiguration
{
    public required string MyMessage { get; set; } = "Hello, World!";
}
We want to write the message to the target path.
[NodeConfiguration(typeof(DemoNodeConfiguration))]
public class DemoNode(NodeDelegate next) : IPipelineNode
{
    public async Task ProcessObjectAsync(IDataContext dataContext, INodeContext nodeContext)
    {
        // Get configuration
        var c = nodeContext.GetNodeConfiguration<DemoNodeConfiguration>();

        // set value
        dataContext.SetValueByPath(c.TargetPath, c.DocumentMode, c.TargetValueKind, c.TargetValueWriteMode,
            c.MyMessage);

        // Continue with next node in pipeline
        await next(dataContext, nodeContext);
    }
}
Now we have to update the adapter service to include:
- Registration of pipelines that needs to be executed
- Start of trigger nodes that execute the pipeline at a specific event
internal class AdapterMeshDemoService(
    ILogger<AdapterMeshDemoService> logger,
    IPipelineRegistryService pipelineRegistryService,
    IEventHubControl eventHubControl) : IAdapterService
{
    public async Task<bool> StartupAsync(AdapterStartup adapterStartup, List<DeploymentUpdateErrorMessageDto> errorMessages,
        CancellationToken stoppingToken)
    {
        logger.LogInformation("Startup of mesh adapter");
        try
        {
            var success =await pipelineRegistryService.RegisterPipelinesAsync(adapterStartup.TenantId,
                adapterStartup.Configuration.Pipelines, errorMessages);
            await pipelineRegistryService.StartTriggerPipelineNodesAsync(adapterStartup.TenantId);

            await eventHubControl.StartAsync(stoppingToken);

            return success;
        }
        catch (Exception e)
        {
            logger.LogError(e, "Error while startup");
            throw;
        }
    }

    public async Task ShutdownAsync(AdapterShutdown adapterShutdown, CancellationToken stoppingToken)
    {
        try
        {
            logger.LogInformation("Shutdown of mesh adapter");
            await pipelineRegistryService.StopTriggerPipelineNodesAsync(adapterShutdown.TenantId);

            pipelineRegistryService.UnregisterAllPipelines(adapterShutdown.TenantId);
            await eventHubControl.StopAsync(stoppingToken);
            logger.LogInformation("Mesh Adapter service stopped");
        }
        catch (Exception e)
        {
            logger.LogError(e, "Error while shutdown");
            throw;
        }
    }
}
Your adapter is now ready to execute the pipeline. The last step in the puzzle is to configure the data pipeline in the AdminUI. We need to create a new data pipeline.
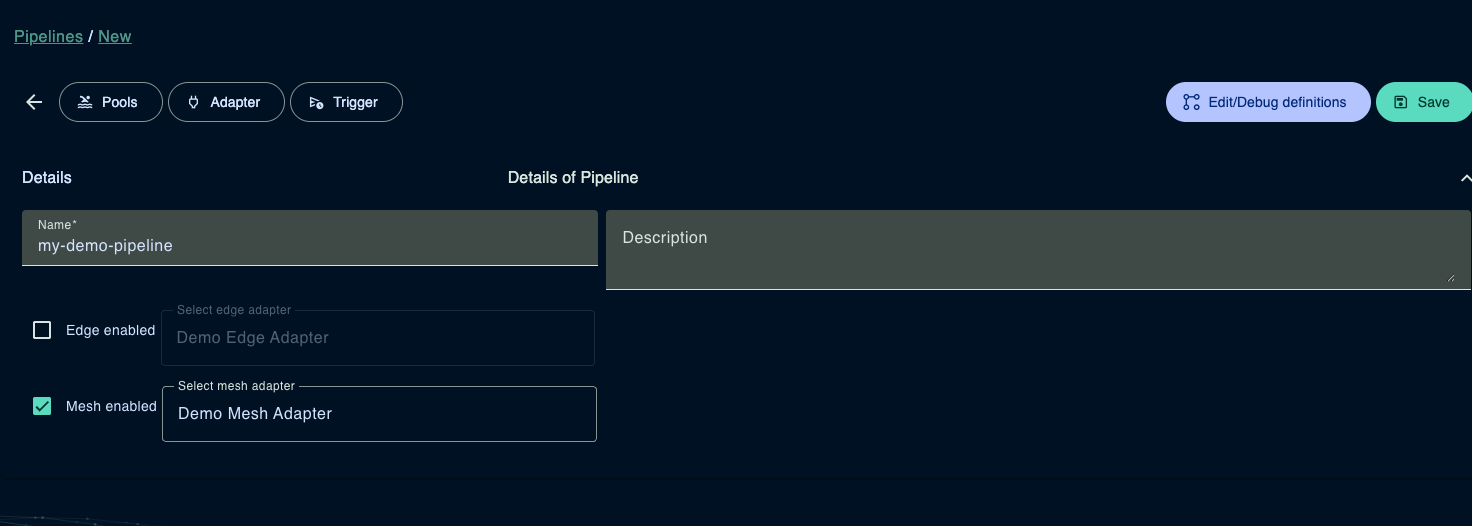
A data pipeline consists of two sub-pipelines: Edge and Mesh. Edge pipelines are executed on the edge, while Mesh pipelines are executed in the cloud. Edge pipelines are optional and can be used to preprocess data before sending it to the cloud.
With the checkbox, you can decide if the pipeline should be executed on the edge and/or in the cloud.
Now we have told the adapter to execute the pipeline, but we have to configure the pipeline, which can also be done in the AdminUI.
By hitting the Edit/Debug definitions button after saving the data pipeline, you can see the Pipeline Builder UI where to enter the pipeline definition.
A basic pipeline definition could look like this:
  triggers:
    - type: FromExecutePipelineCommand@1
  transformations:
  - type: Demo@1
    description: Simulates data
    myMessage: Hello, Mars!
This pipeline definition contains a trigger node that allows the pipeline to be executed from the AdminUI, where a transformation node that writes the message "Hello, Mars!" to the target path.
Save the pipeline and deploy (download) the pipeline definition to the adapter.
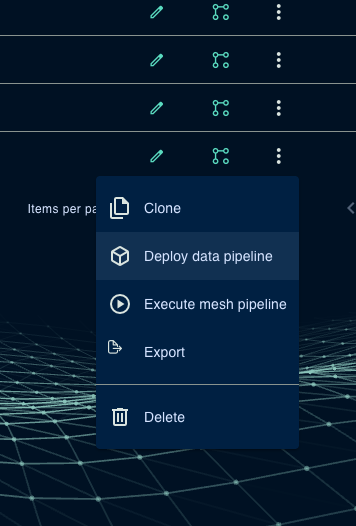
Now you can start the adapter and execute the pipeline from the AdminUI.
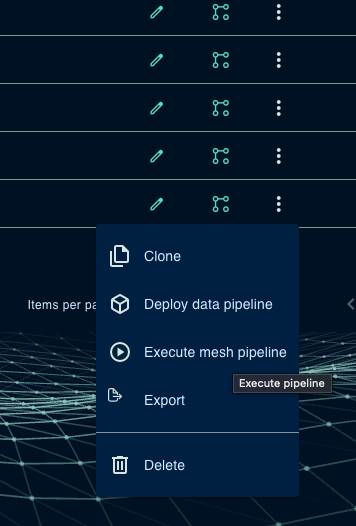
You should see the message in the log output of the adapter. This is an extract of the log output:
 INFO|FromExecutePipelineCommand@1: Received command executing pipeline
DEBUG|[meshtest] Running pipeline for pipeline System.Communication/MeshPipeline@67e135a9477e78e980bbb516 as run with execution id 7a47b1cb-87ae-4511-8ba5-4a87e5825987
 INFO|PipelineExecution: Executing pipeline
DEBUG|PipelineExecution: Node completed
DEBUG|PipelineExecution/Demo@1: Forward Executing
DEBUG|PipelineExecution/Demo@1: Node completed
DEBUG|PipelineExecution/Demo@1: Reverse completed
 INFO|PipelineExecution: Pipeline completed
DEBUG|PipelineExecution: Node completed
For a reference implementation you can check the following repository. This repository contains a more advanced adapter implementation using Containers including a OctoMesh ETL pipeline and CI/CD pipeline based on Azure DevOps